
Getting started with Packet - AEA TNC
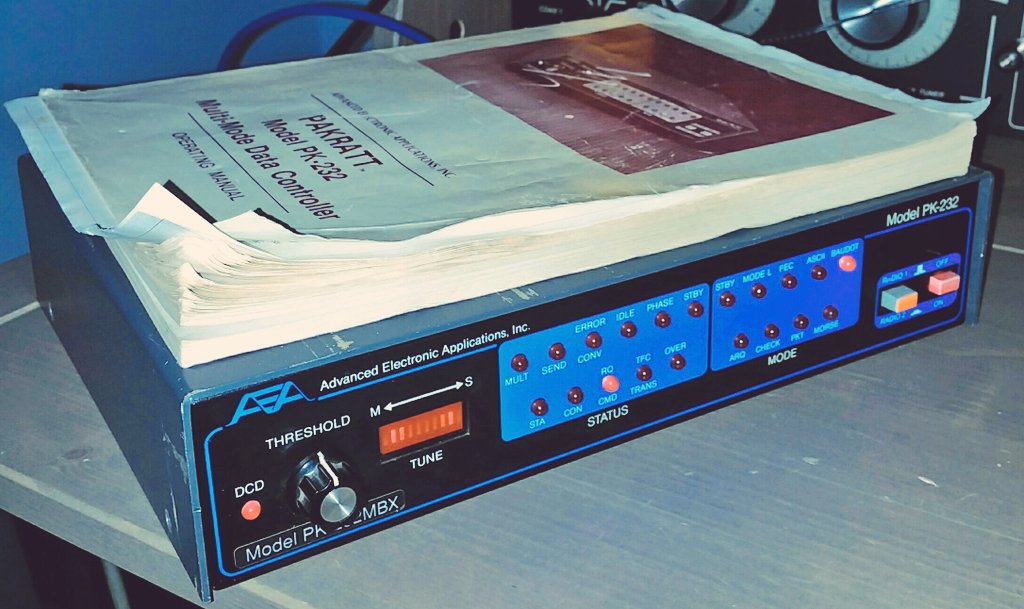
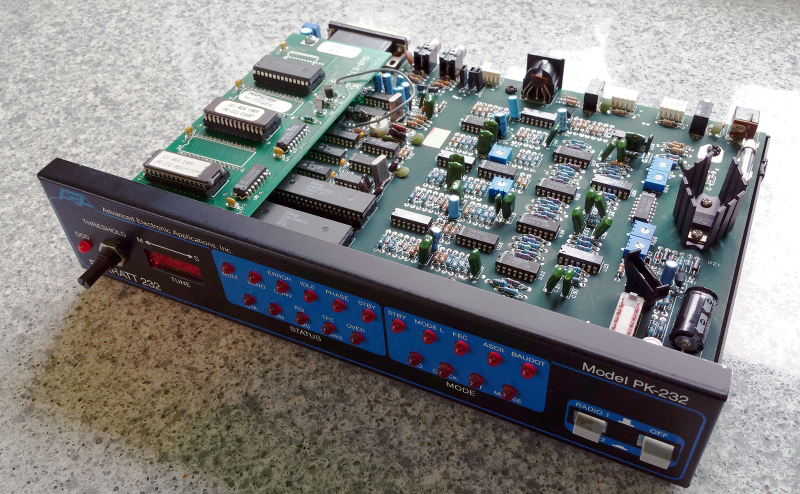
Buying a PK-232 TNC
I'd often seen the PK-232 in shack photos, E-Ham and QRZ.Com classifieds so it was natural to get one as these were highly regarded back in the day. The natural hunting ground was ebay, and whilst these come up in the US regularly, the UK ones are not so prevalent.
I managed to successfully bid for a later PK-232, which was sold as status unknown so was a small risk, although the pictures showed the Baudot LED lit, which could indicate that it booted properly.
This promptly arrived in the original box, manuals and the paperwork for the upgrades from Timewave, namely the CMOS Low Power kit. This was working from a TNC perspective, however this had a dry joint on the Threshold control, which is a 1K ohm Linear Potentiometer. This was replaced.
I then got notified of another PK-232 on ebay, but this one had the MBX upgrade but was cosmetically in worse shape. This was worth bidding for, just for the MBX upgrade, and anything else it had on it. It was an early unit originally, much younger than the one I had previously bought, however this was also in an unknown state.
It arrived, this time with just the manual and some printouts from Timewave's Website back in 2003. Promptly plugged in, this had been upgraded with the MBX daughterboard but was only on the 6.8 version firmware, so no PACTOR, but ready for v7.2 should I acquire it. This unit worked 100%, and was happily decoding RTTY and Morse from the bands.

Cables and interfaces
Always a but of a challenge, Serial Comms back in the day were difficult at the best of times, but I've not had a RS232 jumper box for years and with varying information out there on TNC Serial comms, I set about building a proper cable with hardware handshaking. Whilst the simple 2,3 and 5/7 would make it work (and did just to check the units initially) I wanted the full 1-8 +20 configuration.
Looking through the junk boxes, I found a nice 2m SCSI cable with a 25 pin D connector on one end, a Full SCSI on the other. Shielded and good copper content cables, the wire cutter sliced off the SCSI interface and replaced with the 9 pin D needed to connect to the PC end. A quality Die-cast shell from Tronicized made a robust connector.
My Shack PC still has a single 9 pin serial connector, but I would now need more so an additional card from Startech was procured. I only use Startech peripherals, as they just work and have great support if things don't work out, which is actually more important.
The Audio cables, which for a Yaesu FT-847 is always a challenge because it has two connectors for Packet, and requires additional components to make it work which means that you can't just wire it up ! The HF connector is the one that I wanted to use first, so I set about making a 5 pin IDC connector to Stereo 3.5mm Jack, with a Cap/Res wired in appropriately for the radio. The 5 pin IDC that came with the PK-232 are long gone, and no longer easily available however the 5 pin IDC from Motherboard USBs are available, again from Tronicized which enabled the cable to be completed. (See HF Cable Page - HF AEA PK-232 to Yaesu FT-847 )
The VHF Packet connector on the FT-847 uses a 5 pin mini-DIN connector, and I had one in stock from a soundcard project. (See VHF Cable Page - VHF AEA PK-232 to Yaesu FT-847 )
On the Air
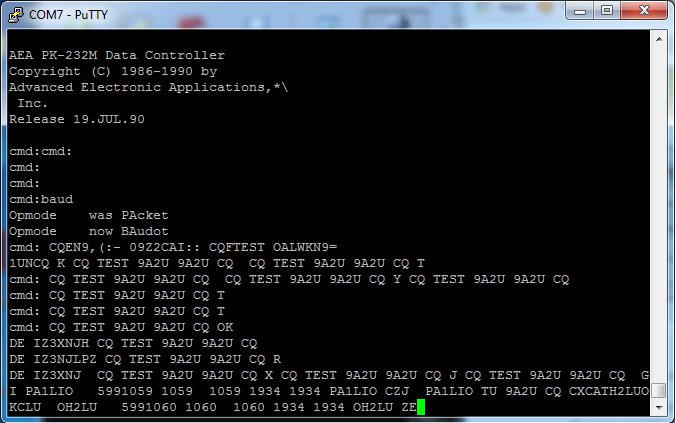
The Radio was connected up and the TNC switched on. The lights flickered and the Baudot LED lit. PuTTY was configured on COM7 to 9600 8 N 1, and the PK-232 put two lines of "Junque" characters, by typing a few *, (Shift and 8) This will prompt the PK-232 to auto baud rate to the client.
The output will then be in ASCII, and display the PK-232 boot sequence with Firmware versions etc.
Putting the PK-232 into Morse, by typing MO, then tune the radio to find a loud CW signal which resonated in the Mark/Space indicator with the DCD LED only just lit by adjusting the Threshold control, found the CW QSO's being displayed on the screen. Issuing the BA command, and tuning for a RTTY signal found the same output.
Issuing the X command put the radio into transmit, and the typed words were then RTTY encoded out of the radio. CTRL+D to put the PK-232 back into Receive mode.
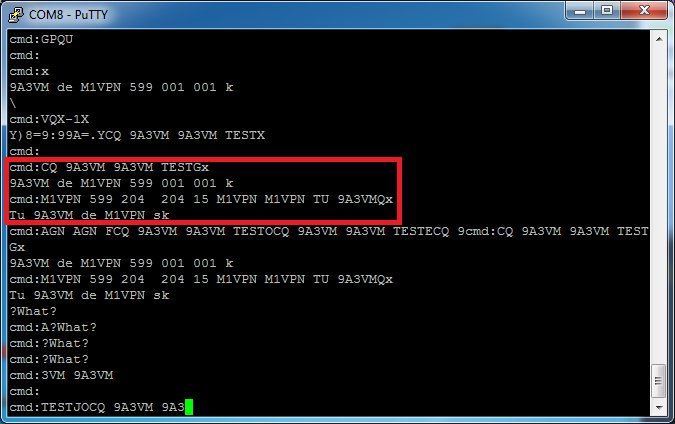
First QSO
On the 13th May 2018, 30 years after the PK-232 was built, I made a QSO on RTTY (Baudot) with 9A3VM. It was'nt the easiest RTTY QSO i've had but I managed a two way communication ! Not having Macro's, and auto stop and start transmissions was tricky but once I'd worked out that I needed to monitor my communication outbound, it became easier.
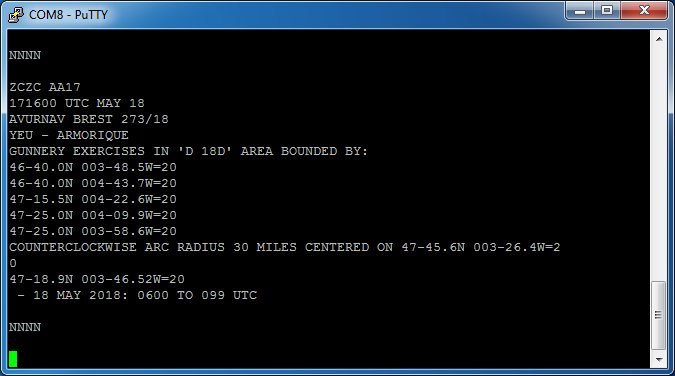
Receiving NAVTEX
One of the first additions to the firmware on the PK-232 was the ability to receive NAVTEX an WeatherFax. The former is a dedicated mode, which configures the unit to decode the text and display on the console. This signal is transmitted worldwide on 518kHz and can be used as a beacon receiver to see how conditions are on the low bands.
Issuing the NA command, sets the PK-232 to NAVTEX receive with Dial Frequency 516.600Mhz USB
Frankenstein's Monster
As described above, I had an early, cosmetically poor PK-232 with a MBX upgrade and a good condition PK-232 with the Low Power CMOS upgrade which is a later edition, but needed a new threshold control.
I intended to make 1 out of 2 here, with the later cosmetically sound PK-232 having the MBX upgrade moved over from the older one with a new Threshold control Pot.
First fix was the Threshold control, and sourcing a through hole 1k Ohm Pot from CPC, and whilst I was at it, a replacement CR2032 battery holder to replace the 3x 1.5v battery box in the top of the lid, if I need to use it which is similar to the Timewave upgrade.
Next, the move of the MBX board, which required the jump lead to be de-soldered from the resistor and placed on the newly removed U2, 3, 4 & 5. This was straight forward, and the firmware moved over with no problems.
Newer PK-232 and MBX located
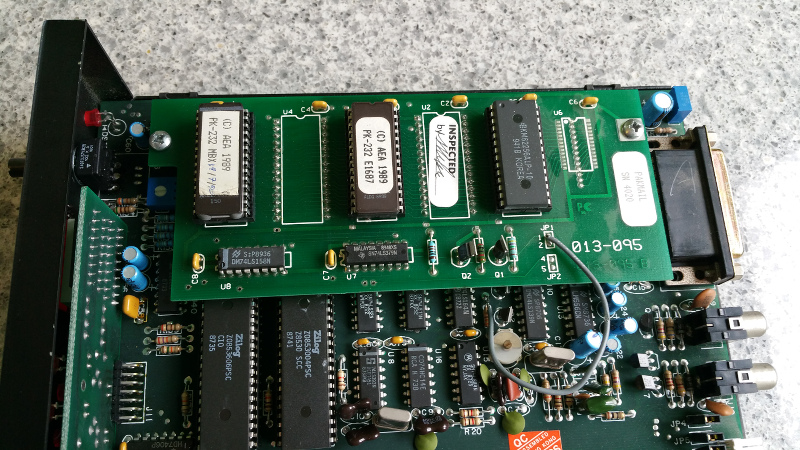
MBX Daughter Board
Upgraded to 7.2 firmware, which includes PACTOR version 1 and a number of software fixes and enhancements.
What happened next ....
With all things, it was bound not to be a straightforward happy ending. I made some Packet QSO's, but there seemed to be a tones issue and also it just did not perform for transmit, receive was excellent, often decoding packets I didn't even hear, but I gave up for a bit. I then stumbled across the CAL function in the manual so decided to do a tune up, which turned out to be another bunch of issues but it got me to the end, somewhat.
Ignore Online Information if it doesn't make any sense, I wish I had done that but learned the hard way. There are no Schematics for the Euro model, and following one for a US model means you might swap components you don't need to. I did, and it made no difference anyway.
The main outcome is that my PK-232 is a Euro Spec model and therefore the tones are set up for 1250/1450 spacing. This would account for the weird CF settings and Dial Freq that I had to use. It also accounted for why, when I tried to get it to work on the US tones, the Pot's would not go that far, even after I swapped them out, thinking they were faulty ! Now, back together and set up, it's on the air with a suitable CF for Network 105.
14.103.3 - CF
1250/1450 - Tones
LSB Dial Freq - 14.104.650 Mhz
Now this is all done, I'd better get started on the PK-900, and that is a complete mess already. I've been asked about why I keep spending time on Hardware when Soundcards can do all this, and the reply is simple. It is because these are interesting modes, supported by interesting hardware. I've got a soundmodem loaded, but the LED's, the quirky cables and the EPROMS make it more fun.
There's also a DSP-2232 on ebay tempting me, But I must resist !
See you on the Terminal ...